 All the original equipment manufacturers (OEMs) have fastener labs with lots of sophisticated equipment and well-educated people working on fastening issues. They even have their own professional association – The Bolting Technology Council – which holds meetings and seminars about fasteners.
I’m not a fastener engineer, and I’m not going to make you into one. I’ll keep this article thorough but fairly basic, giving you a good solid working knowledge of the business of bolted joints.
Fasteners function in an engine to hold parts together. For example, a rod bolt and nut hold the rod and cap together. Fasteners are also, in the case of head gaskets, used to load the gasket with the necessary force to seal the gasket under the forces of combustion as well as thermal expansion and contraction. Understanding some of the physics of fasteners and fastener tightening is necessary for an engine rebuilder who wants to keep fastener failures and engine failures to an absolute minimum.
Threaded fasteners in an engine can be divided into two general categories: critical and non-critical. Rod bolts, main bolts and head bolts are examples of critical fasteners. Critical fasteners can be identified because the repair procedure for the engine details exact tightening information. Pan bolts, timing cover bolts and valve cover bolts are examples of non-critical fasteners having no detailed fastening procedures. Here, we’ll focus on critical fasteners.
Bolt stretch
Bolts are elastic. When you tighten a critical bolt to specs, you’re actually stretching the bolt. As you stretch the bolt, it wants to return to its original length. Based on the quality of steel used in the fastener, the diameter of the fastener and how far you stretch it, the load or force applied to the joint (the two pieces being fastened together) changes.
Think about this for a minute. If you don’t stretch the rod bolts on the next engine you build, what would keep the rod nuts from vibrating loose and falling off as the engine runs? Yes, most of us have experienced just this sort of problem at some time in our lives!
Bolt load applied to the joint by the fasteners seals a head gasket through head lift-off during firing and changes in temperature that occur as an engine runs. To show you how important this is, I’m going to show you a sample calculation our Victor Reinz engineers used to calculate bolt load needed on an engine:
- General approximation (GA) for clamp load to seal a gasket is three times the lift-off force.
- Lift-off force for a 4.250" bore race motor with 1,400 psi firing pressure is 19,861 lbs.
- GA is 19,861 x 3 or 59,583 lbs. per cylinder. With a 5-bolt pattern, 11,917 lbs. of force is needed per bolt.
- With a 6-bolt pattern, 9,930 lbs. of force is needed per bolt.
This then becomes the initial load needed from each head bolt in order to seal the gasket. Specifying the diameter of the bolts and their tensile strength, the engineer calculates a tightening procedure that will provide the desired load to the gasket. Obviously, I’m leaving some factors out of this basic model. Hardware, cylinder head stiffness and gasket relaxation factors would also be considered and factored into the calculations. But, hopefully, you get the idea.
Yield
This is probably a good time to bring up finite elasticity in fasteners. Unfortunately, every fastener has an elastic limit, commonly referred to as its yield point, or more properly, "the threshold of yield." Up to this point, if the load on a fastener is released, the fastener will spring back to its original length. When a fastener is stretched into the yield zone, some of the elasticity is permanently lost, and the fastener will remain somewhat elongated when the load is removed. The further we stretch the fastener into the yield zone, the more elongation we get.
Many of us have observed severe elongation in fasteners as a "necking down." This occurs in the threaded area (the root diameter of a fastener is smallest in the threaded area), usually about one thread above where the fastener is engaged in the threads of the nut or the block (the threads of the nut or engine block support the fastener resisting yield). As most of you have experienced, if you stretch a fastener far enough into the yield zone, it will actually pull into two pieces.
Occasionally in automotive engine applications, the threads in the block or nut will yield before the fastener does, especially where a large number of rundowns (tightenings) have occurred. However, most of the time the bolt yields first. As you can see from the graph in Illustration 1 maximum clamp load from a fastener comes at the threshold of yield or shortly thereafter. Once a fastener is stretched farther into the yield zone, very little additional clamp load is generated and the risk of ultimate failure becomes greater. Consequently, we’d like to have some means of tightening fasteners to get the elasticity we need for load without yielding them.
Tightening methods
Tightening critical fasteners introduces numerous additional factors into our discussion. Traditional methods have all used some means of measuring the resistance needed to turn the fastener. We’ve all used the most basic of those: "seat of the pants," "experience" or whatever you want to call it. The farther we tightened the fastener, the harder it turned, and experience (some bolts loosening and coming apart and breaking a few bolts off) taught us when to stop. Not real scientific, not very repeatable and probably not too reliable!
Torque wrenches improved this procedure immensely. We use scientific terms like Newton.meters or ft.lbs., to gain repeatability and improve reliability. We continue to rely on torque wrenches today to tighten many critical fasteners. The one thing we need to keep in mind is that we’re measuring resistance to turn.
Friction on bolted joints is the biggest factor causing resistance to turn (Illustration 2). In automotive engines, about 90% of the effort required to tighten a critical fastener is used to overcome friction. Ten percent actually stretches the fastener. This is a fairly standard number for the rigid joints we have in automotive engines. For example, a new fastener lubed both under the head and on the threads may exhibit the 90/10 relationship, while a used fastener or one with damaged threads will be 92/8.
Think about this. The more effort needed to overcome friction, the less stretch we get on the fastener and the less load on the joint. What will happen on a joint with multiple fasteners (like a cylinder head) is load scatter (variances in load from bolt-to-bolt) because of minor deviations from the 90/10 relationship. This load scatter causes uneven loads on head gaskets and may also have a negative affect on bore distortion. What we’d like to do as engine rebuilders is minimize the variances from bolt to bolt as we use conventional "resistance to turn" to tighten fasteners.
Unless specified otherwise, 30W motor oil is the standard lubricant for automotive fasteners. If we want to achieve loads similar to the OEMs. we need to lubricate our fasteners with 30W oil. Don’t forget that underhead and thread friction both need to be controlled, so lubricate both areas. In the case of head bolts going into the water jacket, the sealer on the threads will provide the lubrication needed, so just apply oil to the underside of the head of the bolt. Super lubricants may actually get you in trouble by relieving too much friction, leading to over-tightening.
Also remember that the OE engineer did the development work with new fasteners and new threaded holes (or nuts). We need to approximate that work by chasing threads in the block and using new nuts and (or) bolts when we can. Remember damaged threads will increase resistance to turning (friction) and thus decrease load.
It’s very important to engine builders to control friction variables to their best ability to ensure even load across the joint! As an example: race engine builders routinely use studs with hardened washers for mains and heads. The hardened washer gives a very uniform surface for the nut to turn against and keeps friction variances low.
Torque-to-yield
In the mid 1980s, we started to see a move in engine fasteners to a new process called torque-to-yield (TTY). Head bolts were the first fasteners affected, although the technology has trickled down to other critical fasteners. The theory holds that the farther we stretch a fastener toward the threshold of yield, the more load it exerts on the joint.
Now you might say, "If we want more load, we can always use a bigger diameter fastener." That’s correct. Let’s use our (hypothetical) gasket example from Victor Reinz. We need 11,900 lbs. of load on each bolt. We can get that load by stretching a 7/16" diameter bolt to the threshold of yield or by putting a very moderate load (requiring very little stretch) on a 9/16" diameter bolt. The concern is on a head bolt application is that you get lots of change in the joint. Both gasket relaxation on a new installation, as well as thermal expansion on bi-metal designs will cause changes to the joint dimension once the installation is complete. Head gasket relaxation causes loss of load from the fastener. The less stretch you have on the fastener, the more the loss of load. Let’s work our theoretical example:
- 7/16" fastener stretched .070" equals 11,900 lbs. of load;
- 9/16" fastener stretched .030" equals 11,900 lbs. of load;
- A composition gasket installed at .045" relaxes 25%, for a net loss of .011";
- 7/16" fastener loses 1/7 of the load, leaving 10,200 lbs.; and
- 9/16" fastener loses 1/3 of the load, leaving 7,933 lbs.
As you can see, we’ve got a major sealing issue with the 9/16" fastener. Obviously, it’s a big advantage to keep the fastener diameter small and use maximum stretch to seal engines. Also, keep in mind that the longer in length the fastener is, the more it stretches to get the desired load. Just look at modern engine designs today. We have a predominance of long yet relatively small diameter head bolts. You’ll also notice that on the good designs all the bolts are the same length. This makes only one engineering exercise to do rather than two or three as a tightening theory is developed.
Now, let’s look at the other side of this equation. Our head bolt will be pulled or stretched further than the installation dimension because of the thermal expansion rate of an aluminum head versus a steel bolt (Illustration 3). This can be an issue, especially with a fastener installed at the threshold of yield and a gasket that doesn’t relax (Multi-Layer Steel). On a typical cylinder head operating at 250° F, the head bolt will stretch another .005" or so as the engine reaches operating temperature. 
This will often result in the fastener being moved significantly farther into the post yield zone. Repeated movement of the fastener into the post yield zone can ultimately lead to work hardening of the fastener and sudden failure (Illustration 4). You may remember the 2.5L GM engine with a head bolt near the exhaust manifold that broke during service. This was a prime example of this problem.
Torque Turn to Tighten
One thing that should be obvious by now is that if we’re going to tighten fasteners to the threshold of yield, we need a better method than measuring resistance to turn. Friction variances could easily get us into trouble.
Fortunately there is a method of tightening a fastener that is much more accurate than measuring resistance to turn. It’s called Torque Turn to Tighten (TTT), often referred to as angle turn. With this method, you use a relative low torque to run down and align the fastener (Illustration 5), then rely solely on a measured turn to tighten the fastener to the desired level. What we’ve done has not affected the friction in our fastener, it has taken it out of the equation when it comes to tightening.
For instance, 90 degrees of turn is 90 degrees of turn; old bolt, new bolt, rough threads, new threads, it doesn’t matter. The amount of stretch will be extremely uniform from bolt-to-bolt across the joint. Load scatter is kept to a minimum.
TTT is a far superior method of tightening critical fasteners regardless of whether you tighten them to yield or not. Fastener engineers use sophisticated mathematical models to calculate the amount of turn needed to get a desired load, but what has really fueled the rapid growth in this area is sophisticated electronic equipment. Sensitive electronic load sensing cells coupled with angle encoders using advanced software programs have allowed engineers to test their theories watching run down curves in real time as they tighten fasteners (Illustration 6).
Fastener quality
Some articles I’ve read indicate that TTY fasteners are somehow "special", metallurgically speaking. If you’re comparing them to the garden variety bolt from your local hardware store, then, yes, they are. If you’re comparing them to other critical fasteners in an engine, then, no, they are not. They’re high-grade fasteners, typically grade 8 for English and class 10.9 for metric applications (Illustration 7).
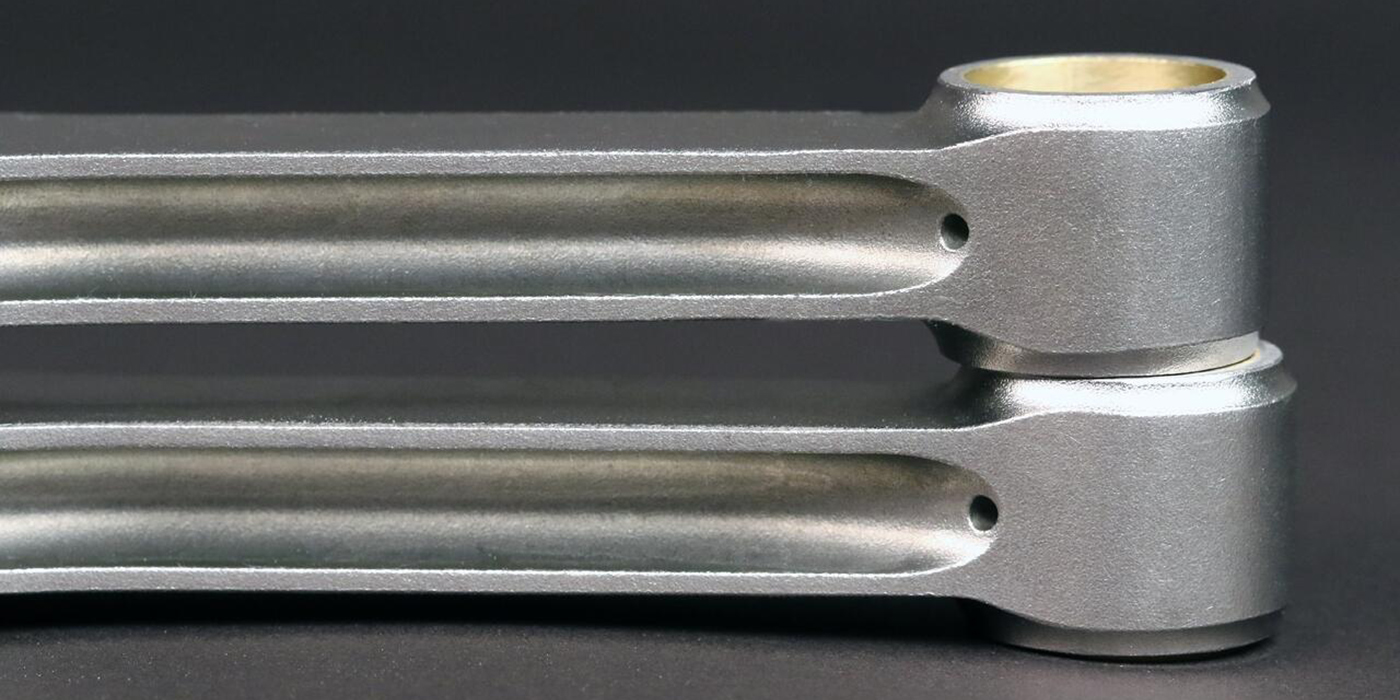
One bit of confusion is that there are true TTY fasteners (Illustration 8), designed with a reduced shank area (Cummins rod bolts and Porsche rod bolts, for example), and there are standard high-grade fasteners tightened to yield. Both styles are tightened to the threshold of yield; the reduced shank style directs the elongation to the shank, where the others elongate in the threaded area. The second style is much more common in most automotive engines.
A final subject is the relative merits to re-using critical fasteners. If I had a dollar for every head bolt I’ve wire brushed and reused I could afford a pretty nice vacation next year. There are very few of us in this industry that haven’t reused critical fasteners!
However, times change, engines change, technology changes, I’ve changed. My policy is that if new critical fasteners – especially head bolts – are readily available, old ones are replaced. Understanding much more about fasteners and engine operating conditions today, I’m reluctant to reuse them.
A well-respected OE engineer specializing in engines tells me that critical fasteners have about six rundowns in their useful life. They use four of those at the OE manufacturing operations, leaving rebuilders just two. One rundown for checking sizes puts us on the last rundown during final assembly. My thinking is: why take the chance? Replace the fasteners! The relative cost compared to the total engine job is small and the peace of mind is high.
I’d like to thank Ralph Shoberg, President of RS Technology, Ltd. (www.rstechltd.com), and Otto Kossuth of General Fasteners, Inc. These two men gave me a fastener education and a pretty good layman’s view of a complicated subject.
Bill McKnight is Director of Training for MAHLE Clevite.