Manufacturers are designing today’s engines with tighter tolerances and less room for error. They make more power, live longer, produce less noise, vibration and friction, burn less fuel and produce lower emissions. So in light of all this, it is more important than ever for engine builders to be as perfect, or near perfect, as possible when it comes to surface finish requirements.
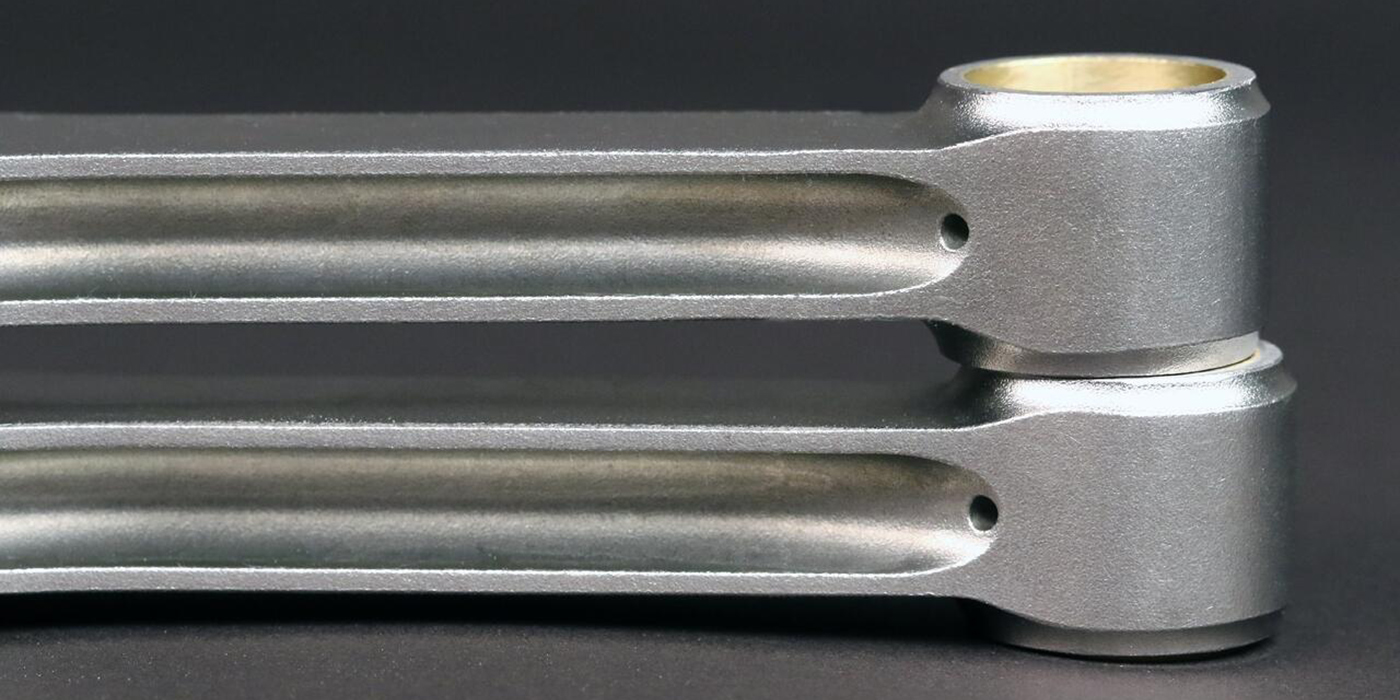
Crankshaft and camshaft finishes are no exception. In today’s engines, rotating assemblies ride on a thin wedge of oil only .00005? thick in some cases. And to help reduce friction as much as possible, oil itself is much thinner today as well, so it is especially important to achieve the proper surface finish on all components in order to avoid problems down the road.
Engine builders big and small have the same need to produce a smooth surface on cranks and cams, but their respective budgets and business volumes may dictate what equipment is used to get the job done properly. Large production engine remanufacturers (PERs) can justify purchasing a micropolisher and an automated surface finish gauge while small custom engine rebuilders (CERs), by-and-large, feel they can’t afford such luxuries. This is not to say that it’s out of the realm of possibility for CERs to afford a micropolishing machine or a surface finish profilometer; but higher volume is generally what justifies making such a purchase.
Belt Polishing
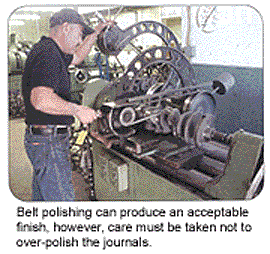
Belt polishing is the traditional method, used by engine builders for many years, to polish crankshafts as well as camshafts. In the past, belt polishing worked well to easily produce surface finishes that were extremely close to OEM levels. Today, however, vehicle manufacturers have automated industrial polishing machines that cost many thousands of dollars and produce very smooth and consistent results, results that are increasingly more difficult for engine builders to reproduce with manual equipment. Difficult, perhaps, but not impossible.
“We achieve an extremely fine finish on the grind, before we polish.” says Bob Heidbreder, Northampton Crankshaft in Cuyahoga Falls, OH. “Our method is to first dress the grinding wheel very fine and then use polishing belts for the final finish. We do all different styles of crankshafts this way and we’ve never had a failure or a comeback because of the finish.”

Customarily with late-model crankshafts, says Heidbreder, rebuilders mic the journals and go through a two-step polishing process. “If the crankshaft is salvageable and you don’t have to grind it, you polish it with a #400 grit aluminum oxide polishing belt. And then, if you need, you would have the option to micropolish the crank to achieve a finer Ra finish. Of course, this depends on the crankshaft you’re working on but most want it as smooth as possible.”
Aftermarket distributors recognize the demand for near-OE quality finishes and offer rebuilders a number of products. “We have a brand new belt that we introduced about a year ago,” says Chris Jensen, Goodson Shop Supplies, Winona, MN. “It’s a GSW micropolishing belt and it is the best thing we’ve found for final crank polishing. You put it on with a little crank polishing rouge and turn it approximately 10 rotations.”
According to Jensen, these belts have even worked well enough for a number of NASCAR racing teams to give them a try. These teams now use them for final polishing the cranks in their race engines.
“What is so nice about this belt is that there’s a serration on it so it can polish the large radius on these high performance cranks,” says Jensen. “High performance cranks have a large radius for strength while many production engines have virtually no radius.”
A number of other distributors offer micropolishing belts as well as portable belt polishers. Tom DeBlasis, K-Line Industries, Holland, MI, says portability brings polishing capability to the price range and user abilities of almost every rebuilder.
“We offer a couple of portable crankshaft polishers: one electric and one pneumatic, which can be used on either a crank grinding machine after you move the head away or on a rotating polishing stand,” says DeBlasis. “Most guys start out with a #320 grit belt, then go to a #400 grit and then progress to a very fine micro-polishing belt for a few revolutions, depending on the application.”
Micropolishing
“A long time ago stones were used to polish cranks and cams but that technology has gone by the wayside now,” says Ken Barton, QPAC, Lansing, MI. “Today, micropolishing is technically the most advanced way to achieve OEM-level surface finish on cranks and cams.”
Barton says many engine builders believe in some polishing “myths,” which can impact a shop’s profitability. “Some rebuilders believe if you use very fine grit belts you will not remove any material. That’s kind of a misconception. You always take off some metal when you polish,” says Barton.
“When you are done grinding the piece with the grinder it looks like a mountain range,” Barton continues. “If you put a micrometer on the piece you’re going to measure from the highest peak to the highest peak. So when we take those peaks down and you remeasure it, you’re going to get a different measurement. It might be just a small amount of material, but some material is being removed.”
Typically that amount may be as small as .0002? according to Barton. One of the challenges is convincing shops that such a small amount actually makes a big difference. “Of course, you have to take material off to achieve the correct surface finish. With micropolishing you’re taking off the peaks and getting down towards the valleys, and the more peaks you remove the more surface area you have,” he says.
Another misconception that some users have is they think they can put a polishing belt on and go crazy with it. “Some people think making the part shiny is enough, but it probably has taper, crown and who knows what else,” says Barton. “If it is within a couple of tenths the error is still there. That’s why we back our machines up with a rigid shoe behind the tape. So now you have a rigid setup that won’t taper or go out of round. That way we keep things round and flat. When you finish you index the tape approximately one inch and go on to the next journal.”
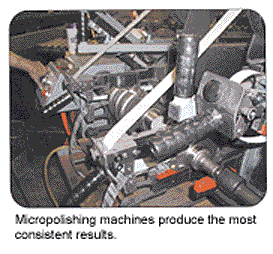
Micropolishing machines use a polishing tape instead of a belt like a belt polisher does. The tape comes in approximately 150-ft. rolls, and when used on a micropolishing machine operators index each roll after each use. When a crank or cam is polished on one of these machines, it uses about one inch of tape per journal, so fresh abrasive is used for every polishing job, but because it’s such a small amount, many users say they’ve saved money. “One PER reported a 50-75 percent savings in the cost of tape vs. belts,” Barton says.
The type of abrasive tape you should use for grinding cranks and cams varies, according to Barton. “From our position it all depends on what is on the machine. Is it a steel, cast iron or nodular iron part? Is it a hardened steel or is it a forged part? Then once you get through the material, what kind of surface are you grinding? We’ve had surfaces as high as 45 Ra and as low as 15 Ra. All that determines what abrasive you use on the polishing tape. It could be 9 micron or it could be 50 micron (note: 20 micron is roughly equal to #600 grit). It just depends on how aggressive you need to be.”

Barton understands that not every shop will purchase his equipment. “For shops to really see a payoff they need to rebuild about 15 cranks or engines a day. Some specialty and high performance shops that sell engines and cranks for much higher prices than average can also make their ROI.”
Measuring the Finish
According to some of our experts there are still engine builders who refuse to use any measuring devices other than a fingernail to measure surface finish. Yet increasingly, it is more important than ever to know exactly what surface finish you have. Without a measuring system, however, you can’t know exactly what you have when you finish polishing.
While you don’t have to measure every piece, measuring Ra during a spot check is a good step toward safeguarding against problems you may not even know exist. There is hope that this trend is going to change as the industry becomes more aware of the need to measure surface finishes.
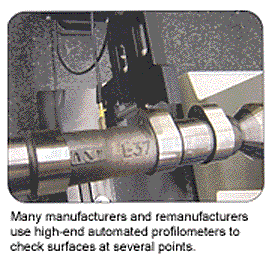
K-Line’s DeBlasis says that a lot of engine builders are at least starting to look at portable profilometers. “Profilometers are not inexpensive and I think that’s why some smaller shops are just looking right now, but we’re starting to sell more of them,” says DeBlasis. A portable profilometer can cost up to $2,000, according to DeBlasis.
There are three characteristics to understand about surface finish: profile, waviness and roughness. According to John Wilt who works with the American Society of Mechanical Engineers Board of Standards on surface finish specifications, a sand dune is a good example of all three. “The overall shape of the dune would be equivalent to the profile, and as you moved in closer to see the windswept ridges, that would be waviness, and the grains of sand would represent roughness,” Wilt says. “Every crank and camshaft has these three features as well, and technically they all fall under the heading of ‘surface finish.'”
However, just because they all represent an element of surface finish, it’s important to approach each component separately.
“Profile is the size of something,” says Wilt. “It could be the diameter. It could be the shape as far as being round or tapered or hourglass shaped. Profile can also be a length measurement. So the journals and the lobes all have to be the right shape and in the right location.”
The second phase of surface finish is waviness or lobing. “If you go along the axis of a crankshaft journal or camshaft journal it would be considered waviness. If you go around the part it’s now called lobing. And a very frequent slang term used for this is called chatter. If waviness is out of spec, that’s where problems with noise and vibration come into play.
“Basically, if you go back to the sand dune analogy, if you were to walk a little closer to the dune and saw all the windswept ridges, there’s something separate that caused that to happen than the profile itself,” says Wilt.
The third phase of surface finish is roughness. “If you walk up and grab a handful of sand from the dune, you’ll recognize that the grains represent roughness. Surface finish is kind of like grains of sand paper that over time creates wear. The valleys in the grains of sand actually are a major contributor to holding lubricant,” says Wilt.
Wilt’s company, Adcole, manufactures surface finish equipment designed to measure all three categories independently. It can measure a crankshaft or a camshaft, giving the manufacturer or rebuilder the ability to look at the shape, size and location first (profile) to ensure that it’s correct. “If the profile is not right the rest doesn’t matter. If it doesn’t assemble or go together it’s not going to work anyway,” Wilt notes.
Roughness Average?
When you read the term “Ra” does it mean anything to you? “If you ask anybody in the industry, we’ve all seen a surface finish symbol: a checkmark with a number, or the roughness symbol,” says Wilt. “The problem is that most people assume they know what it means.”
While shops can often easily get an Ra reading using a handheld device, they may not really understand what it means. One reading may be different than another. According to Wilt most people think Ra is the peaks and the valleys – but it is only an area measurement.
Wilt continues. “If you say you have an Ra of one micro-inch it’s hard for people to understand just what that means. It’s like if I say I have one acre of land for sale for $5,000: would you want to buy it? What do you know about my acre of land? You know only one thing – it’s an acre and it’s got so many square feet. If you know the area is rectangular then you can describe it by its spacing and its peaks, but you really don’t know anything about the area. Saying a surface has such an Ra is exactly the same thing.”
“When you have your Ra you don’t really know what that looks like,” Wilt explains. “It could look like a saw tooth or it could look like a square wave, where it goes up and goes across a little and then it goes down or it could be much spikier or wavier. The net result is you have different capabilities for bearing load. In many cases, simply looking at the roughness average is not necessarily the best way to look at that surface. You want to make sure there’s enough bearing area and you also want to make sure you don’t gouge the bearing surface. So ultimately the part that’s contacting the connecting rod bearing, for example, must have enough surface to bear the load. It’s not just two contact points that will be crushed as soon as the engine rotates.”
Favorable and Unfavorable Direction
One way to achieve the proper surface finish on cranks and cam journals is to grind them in the opposite direction they normally rotate in the engine. Most automotive cranks typically rotate clockwise, but some industrial and marine engines rotate counter clockwise. So you have to know which way the engine rotates before you mount it in the polishing stand.
Polishing the crank or cam in the opposite direction it was ground will also break off more of these ferrite burrs, leaving a cleaner smoother finish as well. Ferrite burrs, if not removed, can cause problems later on because they can wipe away the oil film and cause a bearing failure.
Not all engine builders agree this is necessary, but it should remove the sharp edges of the ferrite burrs leftover from the grinding process and leave what is called a “favorable” finish.
One rebuilder we spoke with says he grinds one direction and polishes the other to get as smooth of surface as possible. However, other engine builders we interviewed say they have not noticed any difference, no matter which way they polished the part.
The main goal in polishing any crankshaft or camshaft is to achieve the smoothest, flattest surface as possible. When cranks and cams are properly lubricated they turn and rotate very smoothly, which does two things: minimizes wear and more importantly it minimizes heat and fatigue. You want valleys for lubrication but also plateau peaks, not sharp peaks, to handle load.
So it is important to remember when you’re polishing that although it looks like art when you are finished, it really comes down to a science.