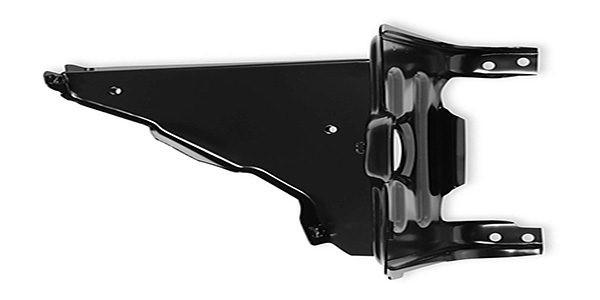
 This information is an update to previously published information on cylinder sleeve replacement for 2002-2006 GM Ecotec 2.0L, 2.2L and 2.4L 4-cylinder engines. The new procedure has been developed to replace the cylinder bore sleeve when the engine is in or out of the vehicle.
A Cylinder Sleeve Removal/Installation tool (p/n EN45680-850) is required for this procedure.
Do not chill or heat the cylinder bore sleeve or the cylinder block when removing or installing a new cylinder bore sleeve. Chilling or heating the cylinder bore sleeve or cylinder block will cause damage and will not aid the removal or installation of the new cylinder bore sleeve.
Do not damage the crankshaft connecting rod journals or reluctor ring or engine damage will result.
Removal:
1) Remove cylinder head, oil pan, piston and connecting rod and bearings.
2) Inspect condition of the piston
3) Rotate the crankshaft so that the counterweight is to the right side and the connecting rod journal is to the left side and not in alignment with the cylinder bore.
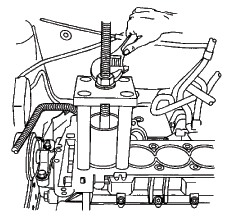
4) Install cylinder bore sleeve puller (p/n EN 45680-852) through the cylinder bore. You must ensure that the shoe is flat against the bottom of the cylinder bore liner or damage to the cylinder bore liner puller will result.
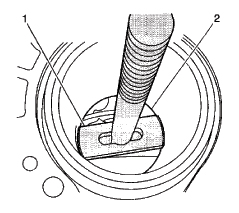
5) Align the shoe (1) of the puller to the bottom of the cylinder bore sleeve (2).
6) Hold threaded shaft of the puller upward in order to retain the shoe alignment to the bottom of the cylinder bore sleeve.
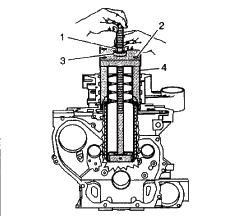
7) Install the fixture (4), EN 456850-851 onto the threaded shaft of the puller (EN 456850-9852) and engine block.
8) Install the bearing (3) and the nut (1); tighten. Use the correct fastener in the correct location. Replacement fasteners must be the correct part for that application. Do not use paints, lubricants, or corrosion inhibitors on fasteners or fastener joint surfaces unless specified. These coatings affect fastener torque and joint clamping force and may damage the fastener.
9) Install and tighten the 4 attaching bolts (2) into the cylinder head boltholes of the block. Use 4 old cylinder head bolts for the attaching bolts.
10) Tighten bolts to 11 ft.lbs. (15 Nm).
11) Rotate the nut clockwise in order to remove the cylinder bore liner. Be cautious not to damage cylinder block surface.
12) Remove EN 45680-851 fixture, EN 45680-852 cylinder bore sleeve puller, and the cylinder bore sleeve from the engine block.
13) Inspect the cylinder bore in the cylinder block for cracks or damage. If cracked or damaged, replace the cylinder block.
Installation procedures will be detailed in an upcoming Tech Center posting.
Some or all of this information was provided by the Automotive
Parts Remanufacturers Association (APRA). For more information on
technical bulletins available through APRA call 703-968-2772 or visit www.AutoBulletins.com.