The factors that typically cause a gasket to fail include age, heat, thermal expansion, abrasion, pressure, vibration, corrosion, material breakdown or poor design. Some gaskets go the distance and others do not.
With head gaskets, problems like detonation and engine overheating can damage the gasket very quickly, causing an otherwise good gasket to crack or crush, burn through and fail. A weak OEM gasket design can also increase the risk of early failure. Some historical examples include the head gaskets in GM’s 2.3L Quad Four engine, Ford’s 3.8L Windstar engine, Dodge’s 2.0L engine in the Neon, and Toyota’s 3.0L V6 truck engine.
A more recent example of early head gasket failure is 1996-1999 Subaru Outback, Legacy GT, Forester and Impreza RS models with the 2.5L engine. In 1996, Subaru used a composite head gasket on these engines, then changed to stronger multi-layer steel (MLS) gasket with a graphite overlay in 1999. The early style gaskets often develop leaks that allow coolant and oil to mix. Symptoms include engine overheating from coolant loss, and an oily residue inside the coolant overflow bottle.
Which of today’s engines will prove to be leakers down the road is hard to predict because it usually takes a number of years for a head gasket or other gasket to develop a leak. There can always be random leaks or head gasket damage caused by overheating or detonation. But if large numbers of vehicles experience the same kind of gasket failure at approximately the same time or mileage, it usually indicates a weakness in the OEM gasket.
Though most late model engines use multi-layer steel (MLS) head gaskets, you’ll also find soft-faced composition head gaskets with a solid or perforated steel core surrounded by graphite or a non-asbestos material. Some have a slippery “non-stick” coating that improves cold sealing and also makes the gasket fairly easy to remove. But others have a sticky silicone coating that adheres to metal surfaces and is difficult to remove.
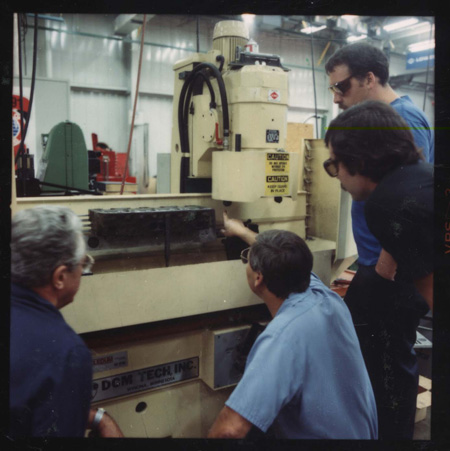
MLS head gaskets, by comparison, have three to five layers of steel and have a very thin rubber coating on the outside to improve cold sealing. MLS head gaskets are very durable, but if they do have to be replaced the rubber tends to stick to the surface and can be difficult to remove. MLS gaskets also require a very smooth, almost polished surface finish to seal properly. Consequently, you have to be extremely careful not to scratch or gouge the head or block surface when replacing a MLS head gasket on one of these engines.
Intake Manifold Leaks
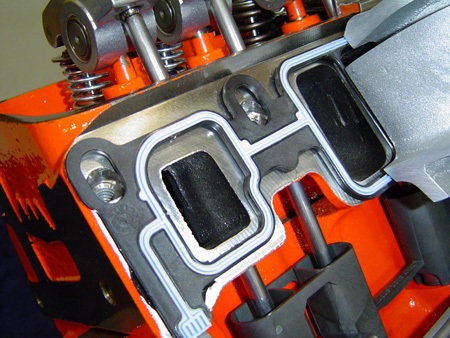
Intake manifold gaskets are also prone to trouble. An example would be intake manifold gasket coolant leaks on General Motors 3.1L, 3.4L and 4.3L V6 engines. When many of these engines reach 60,000 to 70,000 miles, the intake manifold starts to leak coolant around the coolant ports in the head. Symptoms include coolant loss and eventually engine overheating. Adding some cooling system sealer to the cooling system may temporarily seal the leak, but in many cases the only lasting fix is to replace the intake manifold gaskets – which on these engines can be a six- to eight-hour job.
GM’s leaky intake manifold problems have been blamed on the materials used in the OEM plastic-and-rubber intake gasket, and the design of the sealing area around the coolant ports. These engines are factory-filled with Dex-Cool antifreeze, which uses Organic Acid Technology (OAT) additives to prevent corrosion. But over time, the chemical additives in the coolant attack the nylon gasket carrier, causing it to fret and weaken. Add this to the normal engine vibration, thermal expansion and contraction the gasket must endure, and it eventually leads to coolant leaks.
Retightening the intake manifold bolts does not help and only further damages the intake manifold gasket.
Aftermarket gasket manufacturers have developed improved replacement intake manifold gaskets for these leak-prone GM applications. Similar gaskets with more robust materials have also been developed for other leak-prone intake manifold gasket applications, which include 1996-2002 GM 5.0L and 5.7L engines, and various Ford 3.8L, 4.0L and 4.2L engines.
Some of these aftermarket gaskets use a high strength steel carrier instead of a nylon carrier. The sealing beads around the coolant passages have also been redesigned with additional ridges to ensure a long lasting leak-free seal. The port areas are also encapsulated with an elastomer material that can resist chemical attack by OAT-based coolants. The gaskets also have steel grommets so they cannot be overtightened and damaged.
One thing to watch out for when replacing a leaky intake manifold gasket is corrosion around the coolant ports on the cylinder head and/or intake manifold surfaces. If the surface surrounding the port is rough and pitted, the new gasket may not seal any better than the old one. Resurfacing these areas may be required to restore a smooth, flat surface. Another technique that often works is to use a high temperature metal epoxy to fill in the pits and voids around the corroded port. Just be sure to grind away any loose material and clean the surface before applying the epoxy so it will stick to the casting. A light sanding to smooth the surface after it hardens should provide a good surface for the gasket to seal against.
Gasket Removal Tips
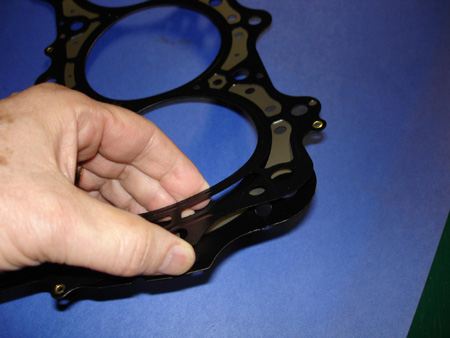
Every type of gasket requires a clean, smooth, flat surface to seal properly. The same goes for RTV silicone sealer and anaerobic sealers if no gasket is used. This requires removing all of the old gasket or sealer material prior to installing the new one or applying new sealer.
If the old gasket sticks, flakes apart or does not peel off clean when you remove it, you’ll have to remove all of the old gasket before installing the new gasket. The best method for doing this is to spray the old gasket with an aerosol chemical gasket remover, then scrape off the loosened gasket material.
A gasket scraper is the best tool for removing old gaskets. A scraper has a sharp bevel edge that gets under the gasket to shear it away from the surface. Hold the scraper at a shallow angle relative to the surface with the sharp edge down and placed firmly against the metal. Then scrape off the old gasket with a pushing motion away from yourself. Don’t use the scraper like a chisel to chip away or dig at the old gasket because you may end up gouging or scratching the casting (which can cause leaks later on). Wear eye protection, too, to keep any debris out of your eyes.
Most aerosol gasket removers take 10 to 20 minutes to soften and loosen old gaskets and sealers. Just make sure you read the directions on the product BEFORE you spray anything. The chemicals in some gasket removers are rather harsh and may attack certain plastics that are used in plastic intake manifolds. Test the product on a piece of similar plastic or on a non-critical area of the manifold to see if etches the plastic. If there’s no adverse reaction, it should be safe to use.
Do not use an abrasive disk to whiz off old gasket material. Abrasive sanding disks have many uses in a shop, but cleaning casting and pan mating surfaces should not be one of them. Here’s why: the rapid cutting action of an abrasive disk in a drill can easily remove metal as well as gasket residue. If you press too hard or continue grinding too long, especially on soft parts like plastic intake manifolds or aluminum cylinder heads, you risk gouging the surface or creating a depression or low spot that won’t seal when you install a new gasket.
Also, on engines with MLS head gaskets, grinding will ruin the polished finish on the head and blocks. This may not matter if the head and block are going to be resurfaced. But why create extra work if the original surfaces are in good condition and don’t have to be resurfaced?
Avoiding Repeat Gasket Failures
Examining the old gasket can often provide clues as to why it failed. With head gaskets, look for carbon tracks on the surface of the gasket. Carbon tracks are black deposits that form in area where the gasket does not seal tightly. You should see carbon tracks around the combustion chamber on a head gasket, but no tracks on the gasket armor or elsewhere.
The presence of such tracks would tell you the gasket was leaking, possibly due to warpage in the cylinder head or block deck surface, or uneven loading due to stretched dirty or damaged head bolts, or bolts that were not torqued in the proper sequence or to specifications.
If the metal armor around the combustion chamber on a head gasket appears to be coated with a bluish or black substance, the engine may have been running lean and experiencing detonation or preignition, or the cooling system may have a problem that caused the engine to run too hot.
Cracks in the head gasket armor around the combustion chamber would likely be the result of a preignition or detonation problem due to a lean air/fuel mixture, carbon buildup in the combustion chamber (possibly due to worn valve guides or seals), overadvanced ignition timing, or loss of exhaust gas recirculation (EGR). The engine may also have damage to the pistons and rings.
Head gaskets can sometimes be shifted slightly out of position because somebody removed the pilot pins that help position the gasket during installation. The pins may have been removed if the block was resurfaced. Without the pins, the gasket may not line up exactly with the cylinder bores and coolant holes, which can cause problems down the road.
With cork/rubber valve cover and pan gaskets, severe engine overheating can make the gaskets brittle, discolored and hard as a rock. Check for cooling problems that would make the engine run hot. If you find rust at the coolant ports, the coolant has probably been neglected. There may be additional problems with corrosion and sediment in the radiator, heater core and engine cooling jackets.
Gasket Installation Tips
If you are replacing a head gasket, the surface of BOTH the head and block must be clean, smooth, flat and free from scratches, pits or corrosion. With conventional head gaskets, the recommended surface finish is 60 to 120 microinches with a cast iron head, or 20 to 50 microinches with an aluminum head.
Surface flatness measured with a straight edge and feeler gauge should not be more than:
• .003? lengthwise or .002? across on three cylinder and V6 heads;
• .004? lengthwise or .002? across of four cylinder and V8 engines;
• .006? lengthwise or .002? across on straight six cylinder heads.
If the flatness of a head or block is not within these specifications, it needs to be resurfaced.
With MLS head gaskets, the specifications are even tighter. Because MLS head gaskets don’t compress much, the surface on the block and head must be extremely flat: less than .002? in any direction with aluminum heads.
The surface finish must also be smoother, typically 20 microinches or less for most OEM gaskets, but up to 50 or 60 microinches with some aftermarket MLS gaskets that have a special surface coating to accommodate rougher high mileage surfaces.
When installing a head gasket, follow the recommended procedure for tightening the head bolts (angle gauge or torque-to-yield). Use motor oil or specially formulated head bolt lubricant to obtain the correct loading on the bolts. Dirty or damaged threads, dry threads or threads that have been lubricated with the wrong type of lubricant can all create misleading torque readings that can prevent a head gasket from sealing.
Do not reuse torque-to-yield (TTY) head bolts. They are one-time use bolts that permanently stretch when tightened. Reusing them is risky because they can break or fail to hold torque. Toss the old TTY head bolts in your scrap metal bin and replace them with new ones.
If you are reusing conventional head bolts, make sure they have not stretched, are not damaged (no nicks or gouges, no distorted threads) and are not corroded. If any bolt appears questionable, replace it.
In high mileage engines, it’s also a good idea to clean and retap the cylinder head bolt holes in the block. This will ensure proper loading and accurate torque readings when the head bolts are tightened.
It’s also essential to use an accurately calibrated torque wrench. Beam style torque wrenches typically stay in range better than adjustable or dial style torque wrenches, but are harder to read. If a torque wrench has not been checked in over a year, it should be checked to make sure it is still accurate. Various tool vendors can check the accuracy of your torque wrench in their tool truck.
Tighten each cylinder head bolt to specifications in the proper sequence. Make sure you are using the latest torque tables as these may have been revised.
With intake manifold bolts, torque to specifications in a crisscross pattern to make sure the gaskets are evenly loaded and seal tightly. With valve cover and pan gaskets, don’t overtighten cork or rubber gaskets. Installing gaskets that have compression-limiting grommets can prevent crushing and gasket damage. Use a sealer and/or adhesive on cork and composite gaskets, but do not use sealer on rubber or coated gaskets.
If you are installing a .020? thick copper or steel cylinder head shim to compensate for metal shaved off the head during resurfacing, make sure the openings in the shim match those in the head gasket so the coolant will circulate normally. The shim then goes on the block, and the head gasket is placed on top of the shim. Most shims typically require the application of sealer, but only to the block side. Use the type of sealer recommended by the shim supplier, and apply a thin, even coating.
Seal Installation Tips
Camshaft end seals and crankshaft main bearing seals are just as important to preventing leaks as the gaskets in the rest of the engine. Rubber end plugs must be installed dry without any sealer.
With crankshaft seals, you want plenty of lubrication because a dry start is one of the leading causes rear main seal failure.
The surface of the crankshaft that contacts the lip of the seal must be smooth and clean. Any roughness will quickly wear the seal and cause it to leak. The crank surface may have to be remachined and polished to provide a good surface, or a repair sleeve can be slipped over a worn crank to restore the surface.
Lubricate the seal lip and crankshaft with engine oil before the seal is installed. Use assembly lube or grease if it will be some time before the engine is started.
Seals with a bare metal outer housing generally require an anaerobic sealer on the outside diameter. Do not use RTV on the seal. Seals with a rubber coating on the outer diameter generally do not require any type of sealer when they are installed.
Debur the edge of the block and cap to prevent damage to the back side of the seal when it is installed, and use the proper driver when installing a one-piece seal to prevent seal damage. The seal should go in straight with a slight interference fit.
Here’s the last mistake to avoid: installing the seal backwards. The primary sealing lip should be closest to the inside of the engine. Most radial lip seals also have a small garter spring inside the seal. The seal should be installed with the spring facing inward towards the engine. This will allow oil pressure to push against the lip from the inside to maintain a positive seal.