Spark Plug Removal Procedure
1. Remove the coil-on-plug assemblies and thoroughly blow out the spark plug wells and surrounding valve cover area with compressed air.
2. Back out the spark plugs no more than 1/8 to 1/4 of a turn. Using Motorcraft Carburetor Tune-Up Cleaner, fill the spark plug well just above where the jamb nut hex sits (1/2 – 3/4 teaspoon). A minimum period of 15 minutes of soak time is required. The cleaner will wick down to the ground electrode shield and soften the carbon deposits in this time. Do not work the spark plug back and forth at this point.
Caution: Excessive Motorcraft carburetor tune-up cleaner, or repeating the process several times with too much cleaner fluid, could introduce enough liquid volume to hydro-lock the engine.
3. Tighten, and then loosen the spark plug, working the plug back and forth. Some screeching and high effort may be noticed. The expected removal torque is about 33 lb.-ft. (45 Nm). Repeat the back and forth turning as needed until turning effort is reduced, and remove the spark plugs.
Ford says do not use power tools for the plug removal — spark plugs must be only be removed with hand tools.
Separated/Broken Spark Plug Removal
If the spark plug separates after following the Spark Plug Removal Procedure, it will fail in one of three modes. Refer to the appropriate removal procedure as required.
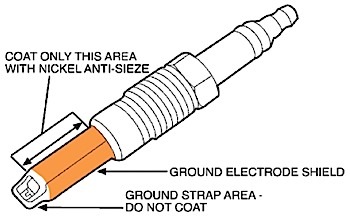
• Mode 1: The ground electrode shield is left behind as an empty shell. (See Figure 2.)
• Mode 2: The entire porcelain insulator and ground electrode shield remains in the cylinder head.
• Mode 3: The upper section of porcelain broke off with remaining porcelain left inside the ground shield.
Mode 1 Procedure:
Use Rotunda special service tool 303-1203 to remove an empty ground electrode shield from the cylinder head.
Note: This tool is only designed to work with an empty ground electrode shield. If porcelain remains, proceed to Mode 2 or 3 removal.
1. Modify vacuum cap to a 3/8′′ (10 mm) length for each ground electrode shield that needs to be removed.
2. Use the installation rod provided with service tool 303-1203 update to install the modified vacuum cap. Push the cap into the ground shield down to the electrode strap. This will plug and protect the combustion chamber from contamination.
3. Thread-tap the ground electrode shield using a 9.0 x 1.0 mm plug tap (tap profile is about 3-4 reduced diameter threads on the tip end).
a. Coat the end of the tap with general-purpose grease.
b. Turn the tap about three to four turns into the ground electrode shield. Back the tap up frequently to break chips and avoid cut material from coiling-up in the spark plug well. A tap socket adaptor is provided with service tool 303-1203 update to connect the tap to a 3/8′′ socket drive.
Caution: Do not attempt to remove the ground electrode shield with the tap and wrench. The tap may break if this is attempted.
4. Thread Rotunda special service tool 303-1203 into the ground electrode shield. SeeFigure 3.
a. Install the stepped end of the tool pilot bushing into the spark plug well ensuring it bottoms out.
b. Screw the center shank into the ground electrode shield. Do not over tighten the shank, to
prevent thread stripping.
c. Install the nylon washer and jack nut until finger tight.
d. Turn the jack nut until the ground electrode is freed from the cavity and withdraw the tool assembly.
[inpost_gallery post_id=4970 group=”1″]