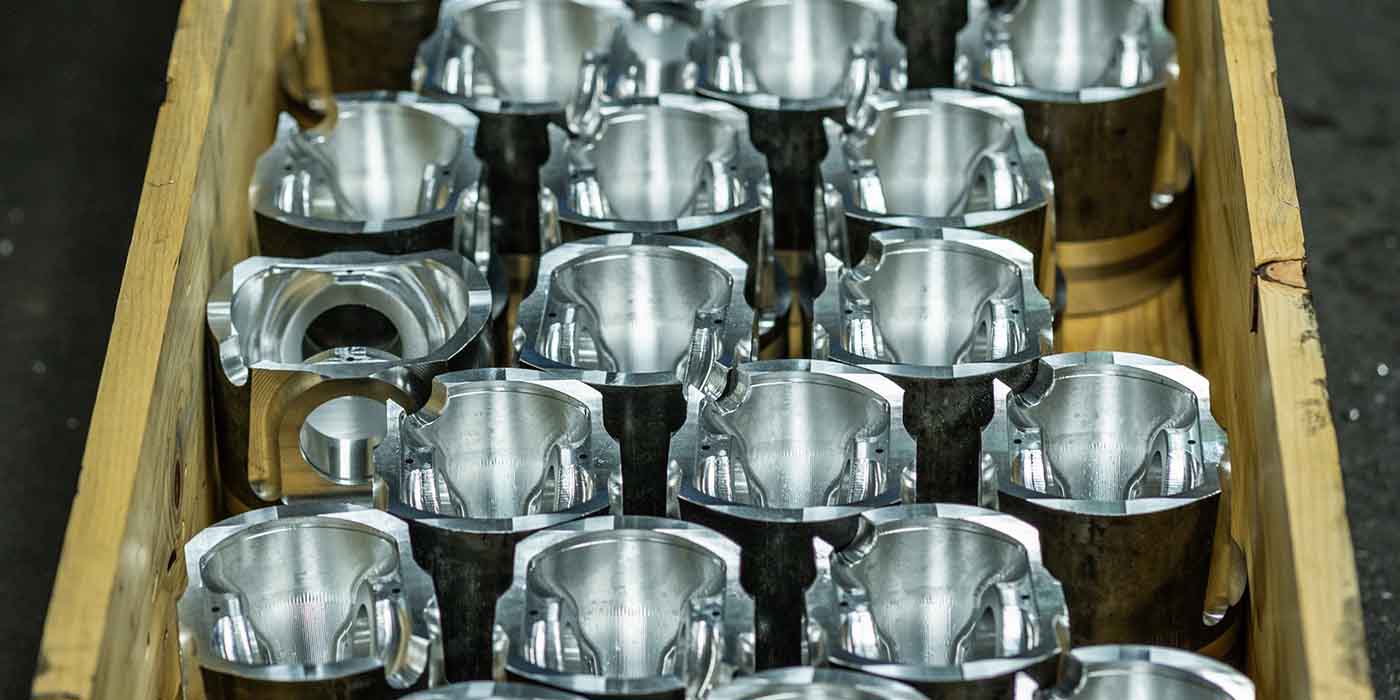
 I’m excited to report that the 392 Magnum engine build is a wrap. We’ve done all we can and now it’s going to power someone’s muscle car, hot rod or truck. Maybe a truck would be fitting since that’s where our original 318 came from. But when all is said-and-done the only things original in this 318 motor are a fully machined block, the cam thrust plate, the fuel pump eccentric and the bolt and washer holding on the harmonic balancer. Everything else is brand new, which made our engine builders very happy. And we’re very happy with their results as well.
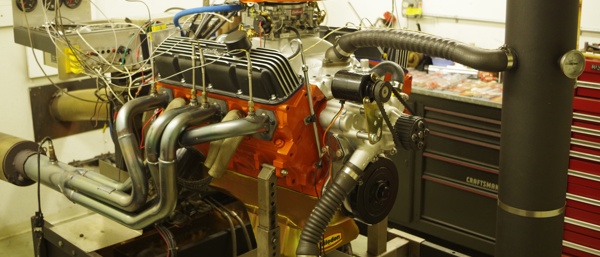
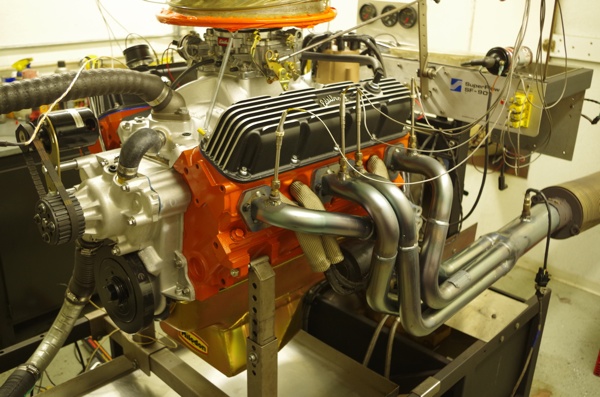
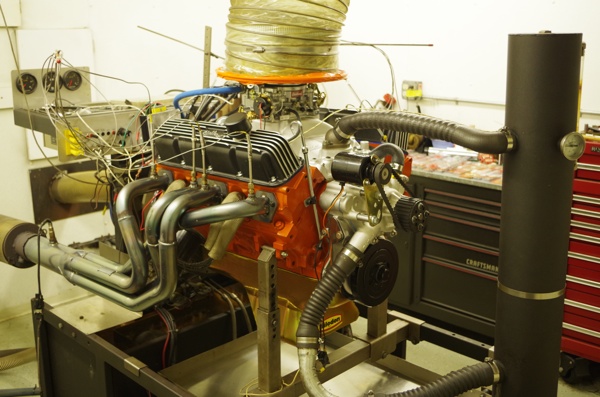
Stacey Redmond and Joe Degraw of Grawmondbecks Competition Engines got the jump on me when they decided to blow off a workday and get our motor hooked up and plugged in to their Super Flow dynamometer. Once it was bolted into the dyno engine stand and wired up like a patient in the intensive care unit, there was nothing to stop them from pushing the button and bringing our monster to life. Since our Edelbrock carb was new in the box, Stacey elected to bolt on “His Carb”, a tried-and-true unit he knew would be dialed-in enough to get the motor started and bring to a fast idle right away. We’re running a flat tappet cam and we’re using Driven BR30 and their assembly lube, but he did not want to take any chances breaking it in, so the decision was made.
Dyno Pulls
By the time I showed up, the Edelbrock carb was reinstalled and the timing was set at 36 total. It fired right up and ran extremely well. The engine ran crisp and clean and had unbelievable throttle response. Once the engine was warmed up, we made a few pulls and were pleasantly surprised. The rings seated in with each pull and both horsepower and torque numbers stabilized. We tried a few changes, but things ended up pretty good right from the start. A few more degrees of timing made no difference. We did change the metering rods one step down, as per the excellent tuning instructions that come with the carb. It could not have been any easier. This made no change to the power, but should help economy a little.
Stacey and Joe had a little trick they used during the E85 build off. They pulled out a couple 3” pipes that were about 40” long. They are flanged to slip over the headers and they slip inside the 6” diameter collectors. The pipes provide a little back pressure. Immediately, the torque curve smoothed out in the lower RPM and we picked up 2 horsepower.
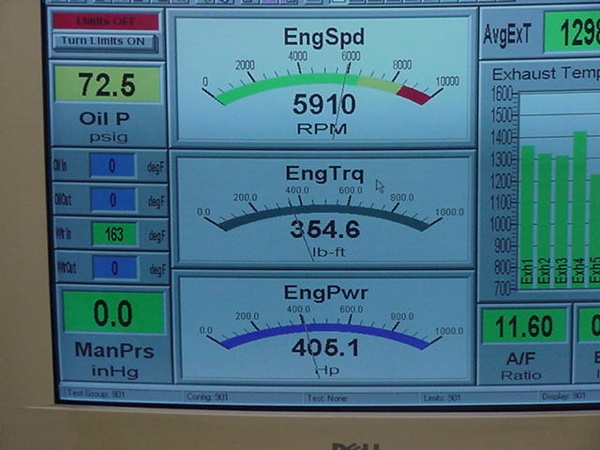
We decided to try a 2” spacer under the carb to see how that affected the performance. No improvement or change, but none was necessary. With 91 Octane from the local station that morning, 36 total in the distributor and everything broke in and running great, we made one last pull. I was very surprised when I saw the printouts.
We cranked out an impressive 477 hp at 5800 rpm. Max torque came at 4400 and was a stump pulling 481 ft./lbs. We were making 421 ft./lbs. at 2800 and as you can see, the torque curve is a gentle arc, right up to our self imposed redline of six grand. At this rpm it was still making 410 ft./lbs.
Reaching Goals
My goals of producing a muscle car like engine from a less than desirable base motor were more than realized.
When you consider we started with a bore under 4 inches, final displacement is less than 400 cubic inches, only 9.5:1 compression ratio, a hydraulic flat tappet cam, unported cast iron heads and a dual plane manifold, I’d say we did pretty good. Far from a max effort, there is still more than enough power to give anyone’s customer a bill for some new rear tires. Yes, we used all new parts and racked up an impressive looking engine as well as an impressive performing one.
But like I said before, this combo could be done on a lot smaller budget and with similar results. We followed the rules set down at the beginning by using shelf stock parts. We followed the advice of our suppliers and the descriptions in their catalogs. We matched the parts to work perfectly together and to meet the expectations we sat down for ourselves. The same way you do when you start working with your customer and their project, I hope.
We started with the premise that it is possible in many cases to build a strong performance engine with the one under the hood, rather than having to buy a high demand “Muscle Car Engine.” By using our budget well, we theoretically chose to purchase a stroker crank and aftermarket heads rather than a worn out high demand core engine. The block was fully machined and the only additional work came when we did a minor amount of grinding for rod clearance due to the new crank stroke.
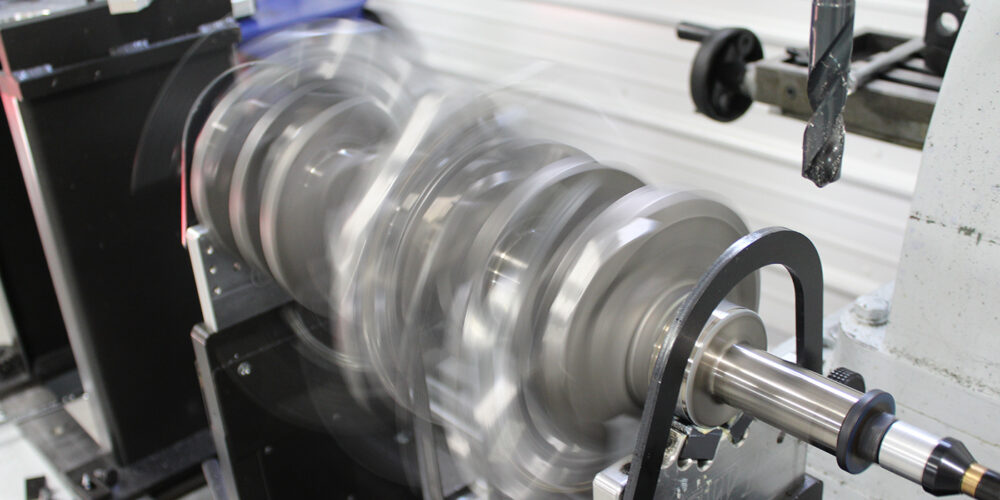
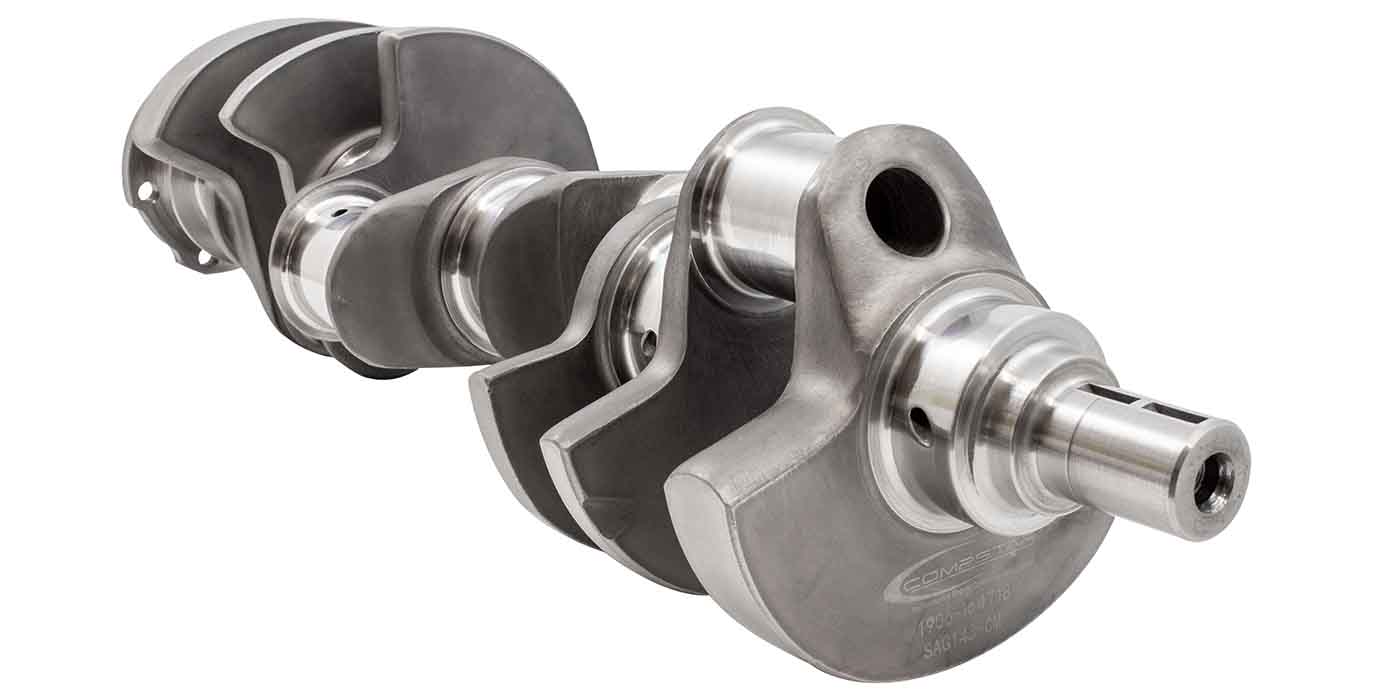
Our crankshaft was donated by Scat and is a 4340 unit that would handle much more power than we are pulling from it. They also donated a set of 4340 I-beam rods. We may have gone a little over board.
Coming Together

Our piston choice was a shelf stock unit as required. They came from ICON and with the short compression height and smaller bore they are very light. Combine these with the lightweight connecting rods and you’re going to be doing some extra work when it comes time to balance the rotating assembly. In our case, we turned down the counterweights on the crank. The alternate combination would have been to use a cast steel stroker crank and the stock Chrysler rods. This combination would be far easier to balance, would be plenty strong for most street motors and would fit the budgetary constrains of most of your customers.
The EngineQuest cylinder heads we used also contributed greatly to the power potential of this project. Over the past 40 years, new car engines have seen vast improvements in the power potential of their heads. Our 1977 318 heads were truck units with small valves and small ports designed for a limited rpm, low rpm torque and fuel economy. The factory Magnum heads from the ‘90’s are a vast improvement over the old “LA” style casting and our EQ heads are a power-improved version of these. Plus you have the option of ordering them with the early intake manifold bolt pattern opening up all kinds of options for an aluminum performance intake.
In our case, we were donated several parts from Edelbrock, but there is always the possibility that your customer already has a manifold since this is often one of the first power improvements consumers add to their engines.
I also liked the fact that the Magnum heads have a pedestal style rocker arm and a higher rocker arm ratio at 1.6:1. This gave us some healthy lift figures, which must be considered when you setup any small block Chrysler heads. We had to machine the spring seats .050” and learned that the EQ head could safely be machined .080”. But by combining a valve lock that gave us a plus .050” installed height and the machining of the spring seats we were able to get the 1.700” installed height the valve springs and valve lift required. We did have to work at a valve, spring and retainer combination, but we tried to do it the hard way and keep the 5/16” stem diameter of the Magnum head. A much easier remedy would be to drill the guides to 11/32” and use a set of valves cataloged for a small block Chevy. And, since we had to get a set of pushrods based on a custom length, I’d order a set of .100” long Chevy valves and forego all the extra machining. Our pushrods, valve springs and many other parts came from Engine Pro. Our stainless valves came from Ferrea and were found by comparing the size of the O.E.M. valve with the information found in the Ferrea catalog. We used valves cataloged for a GM LS motor and increased our valve size a small amount. No other modifications were made to our new heads.
The balance of the build was straightforward and would be the same whether it was a stroker or a stock engine rebuild. The balance of the engine kit parts were from our everyday parts suppliers. We used Mahle crank bearings, DuraBond cam bearings and finish kit, a Melling pump, drive and freeze plugs. Lunati did supply our performance cam and lifters and an Engine Pro timing set connects it to the SCAT crank. The nodular iron race rings that match the ICON pistons also came from Engine Pro. Comp Cams supplied the adjustable roller tip rocker arm kit and the whole thing was assembled with a selection of gaskets from Fel-Pro and Federal Mogul. The heads are held in place with a set of ARP bolts.
Finishing Touches
The outside of the engine was given a couple coats of Chrysler Hemi orange. This gives a great backdrop to the satin finished Edelbrock Performer RPM manifold, 800 cfm carb and water pump. We also left the new EngineQuest aluminum timing cover raw. This was then topped with a very nostalgic looking set of Edelbrock Classic Series valve covers and air cleaner in a black finish with polished fins. The gold irradiated finish on the Milodon oil pan adds to the classic “Muscle Motor” look. A small amount of “bling” comes from the chromed Holley fuel pump and filter, chromed dipstick and tube and the polished stainless fasteners from ARP. The light brown cap on the ACCEL distributor and the finned coil also add to the period look. DEI provided the plug wire protection. We had to debate the use of this, as the yellow ACCEL plug wires would have fit in with the look. We did run into a last minute problem when we discovered we had a set with 90-degree plug boots. We probably needed a set of 135 degree to come over the top for the Chrysler heads. So we routed things from the bottom, which cleans things up visually and gave us a chance to use the protective products from DEI.
The next owner can adjust these as they see fit, but I was very pleased as it shows as well as it goes. This combination of parts, both inside and out, match the original concept I had over one year ago to-a-T.
I have to admit it had been a while since I had been so close to an engine build and was certainly reminded how time consuming, frustrating and rewarding such a project can be. We must thank Joe, Stacey and Steve for all of their work, support and patience and for the use of their facility and mostly for their time. This was not their project to manage, but they certainly helped keep me on the right track at times. They were very understanding when I needed to bring things to a stop for pictures, and when I needed to find a way to make things work with the products on hand. We must also thank all of our generous suppliers. It’s true when they say, “This could not have been done without them.”
The build was a success, thanks to all of our supplier partners. But getting it built and getting it seen proved to be two different animals. Thanks to Sue Sherman at Endural (www.endural.com) for the generous donation of the reusable transpiration case. Also thanks to Scott Scovronski and his team at Howard’s Cams in Oshkosh, WI (www.howardscams.com) for doing the heavy lifting (literally!) and transporting our engine to and from the PRI Show. And thanks to Scott Stolberg and Eric Haugland from EngineQuest (www.enginequest.com) for allowing us to display the engine in their booth at PRI!
The engine is being auctioned on ebayMotors (search Chrysler 392 Magnum) with proceeds to benefit and support the Independence Fund (www.independencefund.org). These men and women have sacrificed a lot for us all and they deserve our support.
Lastly, I’d like to thank the readers who have contacted me and for all who gave their support. I’m aware that the readership does projects like this one daily. I hope I have been able to contribute an idea or two and made it worth your while to follow along.
I hope the original “Dare to be different” idea resonates next time your customer shows interest in building a performance engine and feels he has to have the same thing that’s been done hundreds of times before. Maybe you can show them “How to love the one they’re with.”