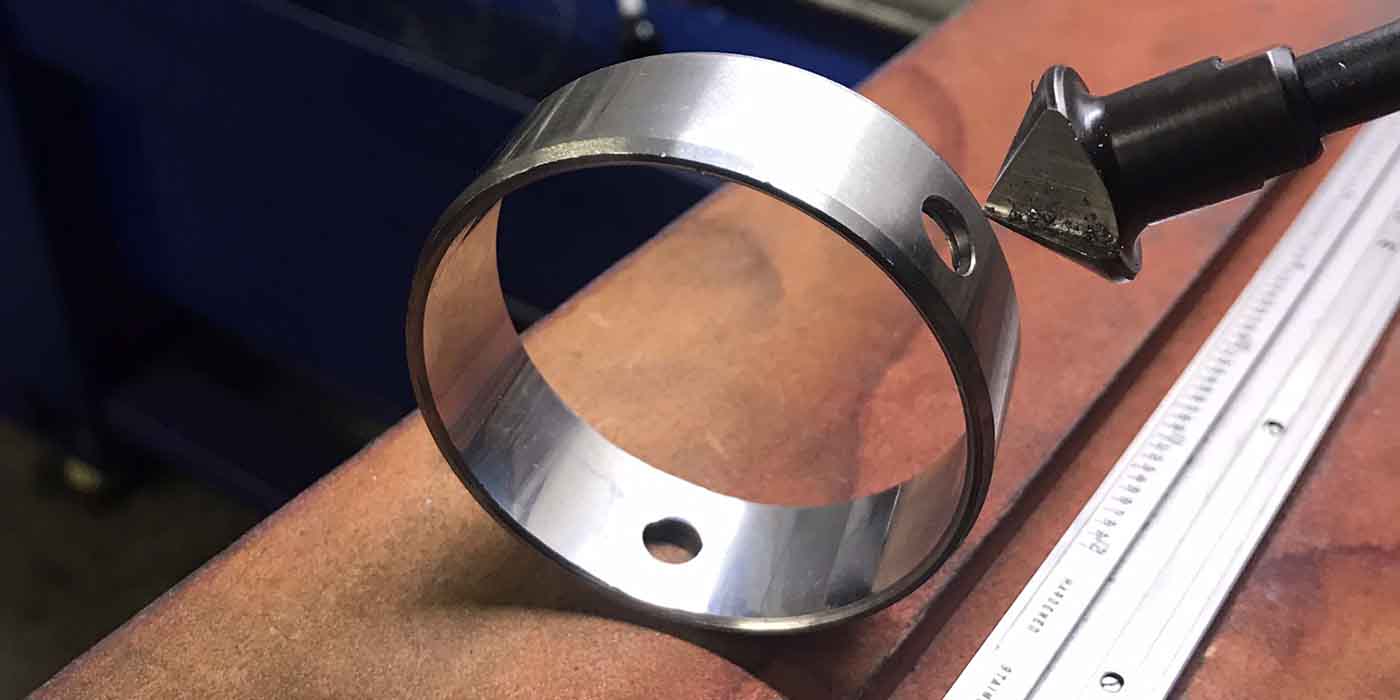
POLISHING THE BIG END
I’m starting to see more and more cracked powdered-metal connecting rods these days. After checking to make sure the size is correct, I use a plateau brush with a few drops of oil to clean up any rust or dirt. If you have a finished set of rods that have sat for a while and have some rust, you can use this method to shine them up as well. Works great to give a finished look without enlarging the bore.
Joshua Pridgen, Parks Engine Service, Inc., Seguin, TX
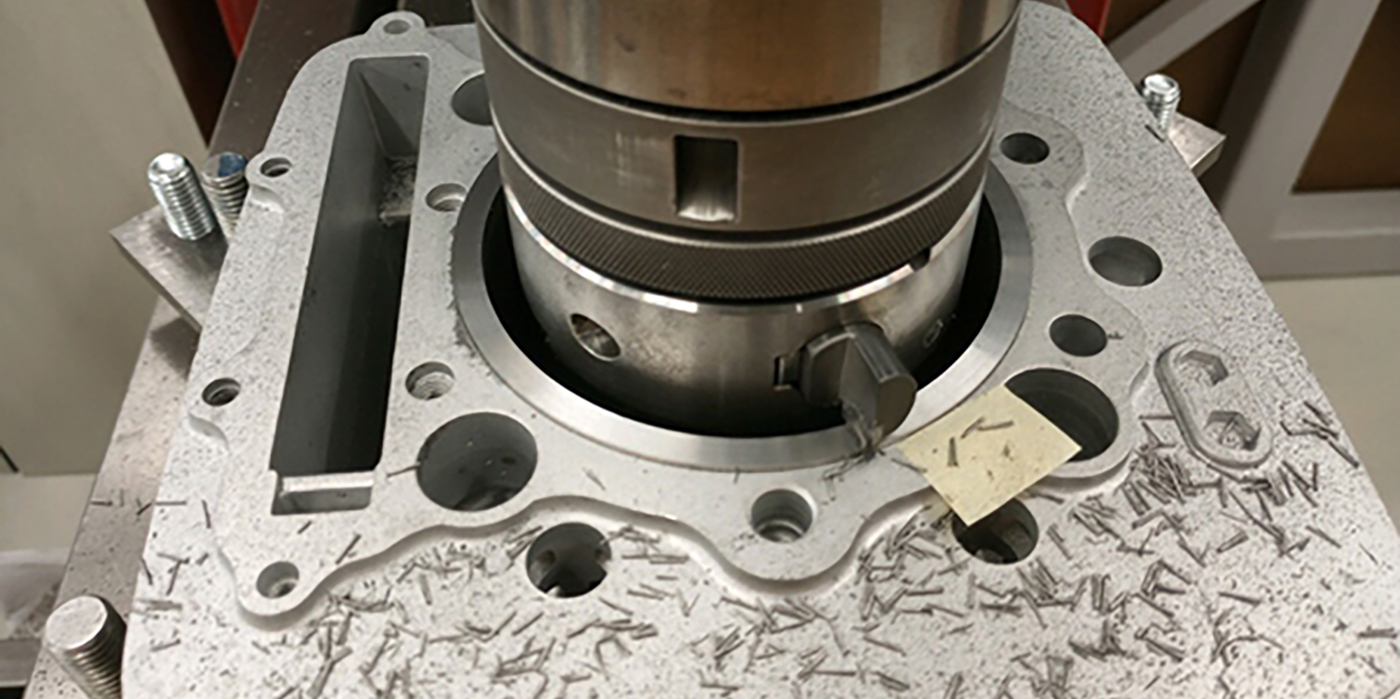
EXTRACTING SHARP EDGES
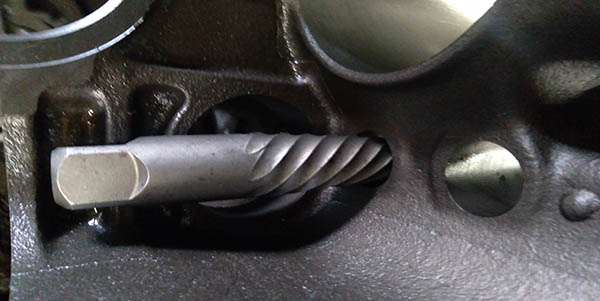
I like to chamfer the sharp edges on lifter bores after shotblasting blocks. I use a spiral flute extractor and just rotate it clockwise a few times with my fingers to remove any peened over edges. I find that it works better than a lot of my chamfering tools.
Dave Matton, D and D Auto Machine, Bloomington, MN
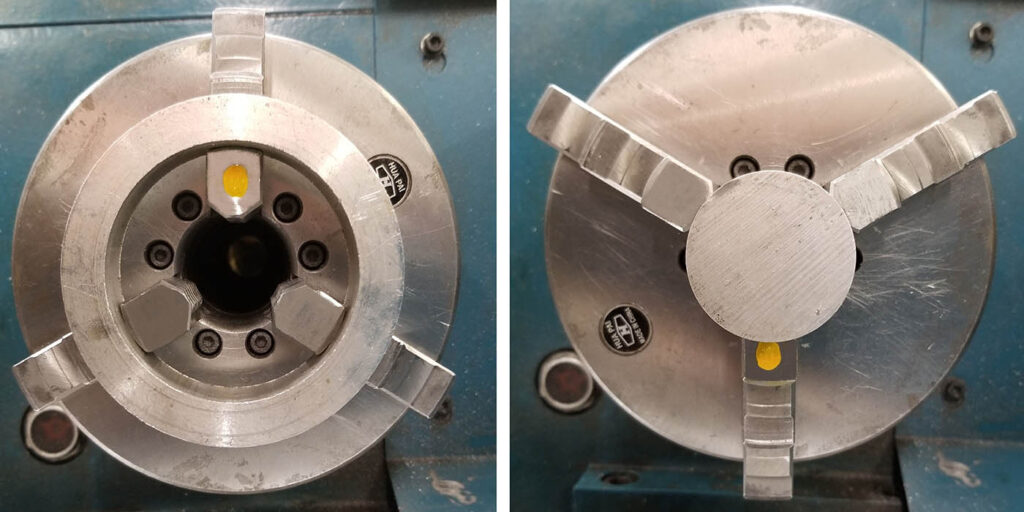
CHUCKS AND MORE CHUCKS

Here’s a few rookie tips that a few old timers may have forgotten. The risk of a drill bit slipping in a Jacobs chuck, gouging the drill shank, can be significantly reduced by tightening all 3 “holes” in the chuck with the chuck key.
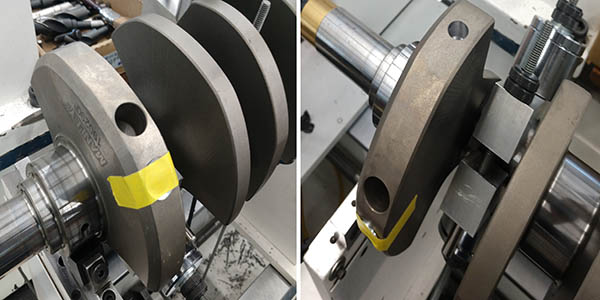
When clamping the O.D. of a part in a three-jaw lathe chuck, place a jaw in the 6:00 position (jaw with yellow dot in picture). Rest or hold the part against this jaw as you tighten the chuck. This will improve the centering and alignment of the part. When clamping the I.D. of a part, place a jaw in the 12:00 position; rest or hold the part against this jaw as you tighten the chuck. This will improve the centering and alignment of the part.
With most three-jaw lathe chucks, tightening one of the chuck-key pinions usually centers the part better than the remaining two pinions. Mark this pinion with a punch (circled with black paint, upper left in the picture). To determine which pinion centers best, number the pinions and clamp a precision round workpiece in the chuck. Tighten the chuck using only the first pinion and test the pin’s run-out with an indicator. Repeat the process for the other two pinions. Punch-mark the pinion that causes the pin to have the least amount of run-out. In use, begin by lightly clamping the part using the marked pinion first. Next, snug the other two pinions, then finish tightening the chuck using the marked pinion again.
Tom Nichols, Automotive Machine & Supply, Inc, Joshua, TX
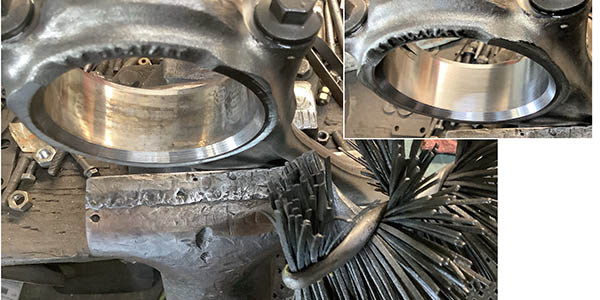
MOVE YOUR SPOT
Sometimes, when I first spin up a crank, the correction area is off the counterweight. Instead of grinding up by the rod throw, try adding weight to the opposite end if there are balance holes already. I taped in some flat disc plugs until the “spot” moved onto the counterweight on this one (pictured). Be sure to clean the crank with lacquer thinner so the tape does its job, or you’ll launch them. This crank had the spot off the end almost 15° and three plugs put it on the counterweight. Duplicate the weight of the plugs and create a slug to TIG weld in. This makes for a great-looking job on a race crank.
Randy Torvinen, Torvinen’s Machine Shop, Menahga, MN
BLOW THROUGH VACUUM

If you end up chasing threads or tapping on a machine and don’t want to make a mess blowing them out, here’s a quick tip. Drill a hole in your vacuum cleaner nozzle and feed your blow gun nozzle through it. Now suck the chips up as you blow the holes out. This will keep your honing machine and work area much cleaner.
Ron Flood, Cedar Machine, North Branch, MN