Engine Builders: Synthetic oils have been available for almost 30 years and a number of inaccurate myths have developed during this time. Some areas of misunderstanding are clarified below, including manufacturer requirements for using synthetics, how to switch from conventional to synthetic oil and the effects of synthetics on an engine.
Myth 1: Synthetic oils are too thin to stay in the engine. This is not true. In order for a lubricant to be classified in any SAE grade (10W-30, 10W-40, etc.) it has to meet the viscosity guidelines, or thickness, specified by the vehicle manufacturer.
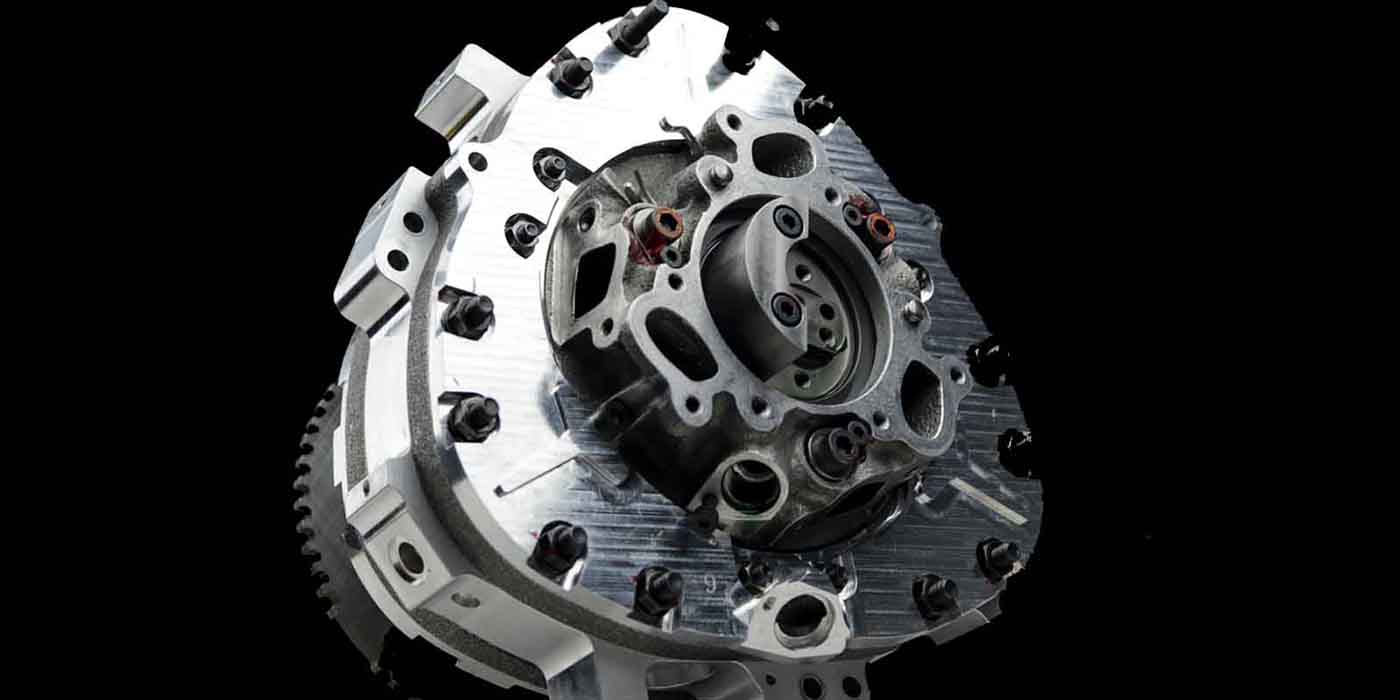
Myth 2: Synthetic oils will void manufacturers’ warranties. Synthetic oils will not void manufacturer warranties. They are formulated with the requirements of the auto manufacturers in mind, and so if used in accordance with the owner’s manual, synthetic oils will not void any of the warranties. The only exception is that full synthetic oils should not be used in Mazda Rotary engines, which have unique and specific lubrication requirements. Always check the vehicle owner’s manual.
Myth 3: You can’t switch between conventional oil and synthetic oil. Switching between synthetic and conventional oil will not cause any harm to engines. Synthetic oils and conventional oils are formulated to help protect your emission system, including oxygen sensors and catalytic converters.
Myth 4: Synthetic oil will make seals leak. If an older engine’s seals do not leak with conventional oil, they will not leak after switching to synthetic oil. Synthetic oils do not damage engine seals in an engine of any age.
Myth 5: Synthetic oil cannot be used to “break in” a rebuilt engine. In a rebuilt engine, a certain amount of controlled wear can be expected to occur to allow piston rings to “seat” and the engine to “break in.” Synthetic oil may be used for the “break-in” period and throughout the life of the engine.
Synthetic base oils combined with a strong additive package allow synthetic oils to perform better than conventional motor oils under virtually all conditions. – Provided by Pennzoil
Engine Builders: The AERA Technical Committee offers the following information on the proper engine bedplate seal to use for 1995-2004 Chrysler/Mitsubishi 2.0L VIN Y non-turbo engines. There is no paper pre-formed gasket used in this location. The seal is created when an anaerobic sealer is applied to the mating surfaces and the components are clamped together with the proper torque.
To install the bedplate onto the block, both surfaces must be cleaned and dry before applying the appropriate sealer. Chrysler recommends its Mopar Torque Cure Gasket Maker; an aftermarket equivalent is Loctite® 19614. Before installing the bolts, the threads should be oiled with a small amount of clean engine oil.
Mopar Torque Cure Gasket Maker is a unique anaerobic type gasket material to be used ONLY between the bedplate and engine block. The material cures in the absence of air when torqued between two metallic surfaces. It will not cure if left in the uncovered tube. This anaerobic material is specially made to seal the area between the bedplate and cylinder block without disturbing the bearing clearance or alignment of these components.
Caution: Do not get oil on the bedplate mating surface, as it may affect the sealer’s ability to seal the bedplate to cylinder block.
Apply a continuous .059″ to.078″ (1.5 to 2.0 mm) bead of the appropriate sealer to the cylinder block area inside the outer bolt holes.
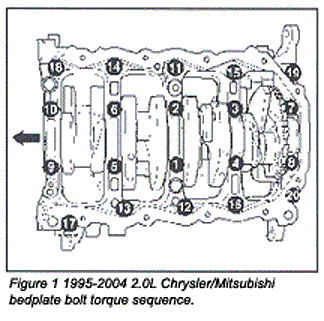
Install main bearing cap bedplate together with lower bearing shells. Caution: Use only the specified anaerobic sealer on the bedplate or damage may occur to the engine.
Install main bearing bedplate to engine block bolts 11, 17 & 20 (see Figure 1) finger tight. Tighten these bolts alternately together until the bedplate has contacted the block.
Install bolts1-10 and torque each bolt to 30 ft.lbs. (41 Nm) in the sequence shown in Figure 1.
Retorque bolts1-10 again to 30 ft.lbs. (41 Nm).
Install main bearing bedplate to engine block bolts 11-20 finger tight, and then torque each bolt to 250 in.lbs. (28 Nm) in the sequence shown.
Retorque bolts 1-10 to 55 ft.lbs. (75 Nm) in sequence.
Retorque bolts 11-20 to 250 in.lbs. (28 Nm) in the sequence shown.
After the bedplate has been installed check the crankshaft turning torque, it should be 50 in.lbs. (5.6 Nm).
Note: It has been reported that using an RTV sealer in this application will allow oil to seep between the mating surface joint.
Engine Builders: The AERA Technical Committee offers the following information regarding an oversize main bearing bore for Caterpillar 3408 diesel engines. Oversize main bearing bores have been reported during engine rebuilding on the above engine.
To allow additional salvage operations and block reclamation the Caterpillar Corporation offers an oversize outside diameter bearing set. The bearings are available in .025″ (.635 mm). To determine if a block you’re checking has the oversize bores follow the procedure listed below:
Install main bearing caps in original positions.
Lubricate cap bolt threads and bolt head contact surfaces with a small quantity of thread lubricant 2P2506.
Install and tighten main cap bolts on the left side to 180-200 ft.lbs (246-274 Nm).
Install and tighten main cap bolts on the right side to 180-200 ft.lbs. (246-274 Nm).
Tighten the main cap bolts on the right side by rotating them an additional 120°.
Tighten the main cap bolts on the left side by rotating them an additional 120°.
Measure bores with a dial bore gauge which has a dial indicator calibration in .0001″ increments.
Record your measurements and compare to the standard main bore diameter specification of 5.1133″-5.1143″ (132.994-133.031 mm).
If the block you are checking is larger than the above standard specification, compare it to the oversize dimension of 5.1383″-5.1393″ (130.513-526.539 mm). If there is a need to resize, it is recommended to go to the oversize, rather than repairing by align boring back to standard dimensions.

